Extraction forceps numbering — anatomy & how to choose
Fig. 1, Fig. 17, Fig. 79, Fig. 137… The number system on extraction forceps is older than modern dentistry and exactly as confusing as it looks. This guide decodes it tooth-by-tooth across the 74-strong ErgoDenta forceps range.
Extraction forceps numbering — Fig. 1, Fig. 17, Fig. 79N, Fig. 137 and so on — comes from the early 20th century surgical instrument catalogues. Each figure number designates a specific forceps geometry intended for a specific tooth or group of teeth. Once you can decode the system, choosing the right forceps becomes routine. ErgoDenta carries 74 extraction forceps across the adult, junior, child and Diamond ranges, all built on the Grip Master ergonomic handle.


How the numbering system works
Extraction forceps figure numbers are assigned by tooth position and beak geometry. The system is not strictly logical — it accreted over a century of catalogues — but a small set of rules covers most of the range:
- Figs. in the 1–10 range — typically upper anteriors and premolars (Fig. 1 = upper central incisor, Fig. 7 = upper canine, Fig. 17 = upper molars).
- Figs. 13, 22, 23 — lower molars. Fig. 22 has a smooth beak; Fig. 23 has the characteristic "cowhorn" pointed beak that engages the bifurcation.
- Fig. 17 — upper molars (paired left/right because of the buccal root divergence).
- Fig. 79N / 79 — lower third molars (impacted or erupted).
- Fig. 151 — universal lower premolars / canines / incisors.
- Figs. 137, 139, 138 — child / pediatric extraction forceps for primary dentition.
Tooth-by-tooth quick reference
Upper jaw
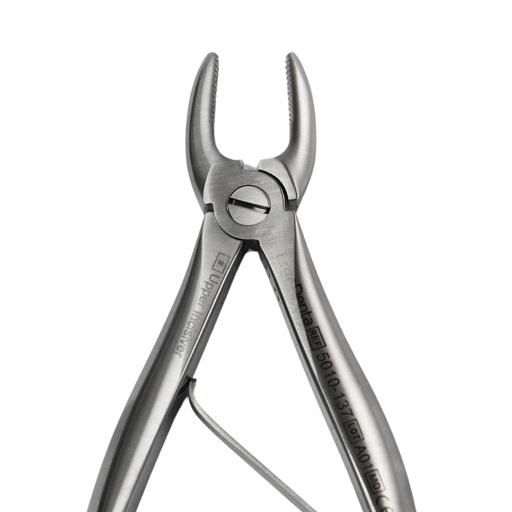
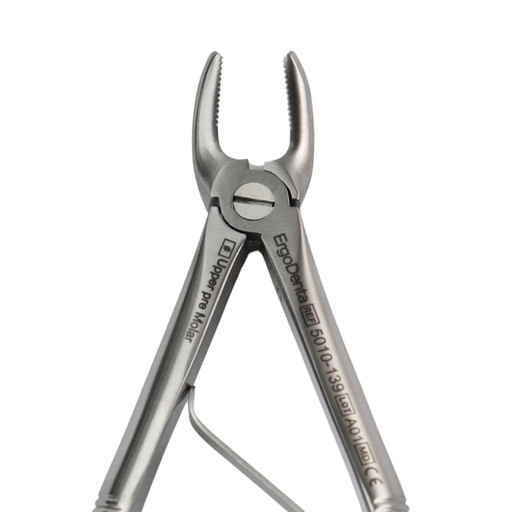
ErgoDenta upper-jaw extraction forceps — Fig. 1 (upper incisors), Fig. 7 (premolars), Fig. 17/18 (molars right/left), Fig. 67 (wisdom), Fig. 51A (roots).
- Upper centrals & laterals — Fig. 1, Fig. 2, Fig. 99C
- Upper canines & premolars — Fig. 7, Fig. 7A
- Upper molars right — Fig. 17R (or Fig. 18R)
- Upper molars left — Fig. 17L (or Fig. 18L)
- Upper third molars — Fig. 67
- Upper roots — Fig. 51, Fig. 51A
Lower jaw
ErgoDenta lower-jaw extraction forceps — Fig. 13 (premolars), Fig. 22 (molars), Fig. 23 (cowhorn), Fig. 79 (wisdom), Fig. 33A (anteriors/roots).
- Lower incisors / premolars / canines — Fig. 151 (universal lower)
- Lower molars (smooth beak) — Fig. 22, Fig. 73
- Lower molars (cowhorn) — Fig. 23 — beaks engage the bifurcation directly
- Lower third molars — Fig. 79, Fig. 79N
- Lower roots — Fig. 33, Fig. 33A, Fig. 74
Adult vs Junior vs Child forceps
Pre-built kits for general practice and paediatric work — Standard 10-piece, Diamond 10-piece, Child 7-piece kits.
ErgoDenta carries three size scales:
- Adult (full-size) — standard surgical forceps for permanent dentition. Larger handle, wider beak engagement.
- Junior (e.g. Fig. 13K, Fig. 22K, Fig. 37K) — slightly smaller forceps for adolescent permanent dentition or smaller adult anatomies.
- Child (e.g. Fig. 137, 139) — pediatric forceps for primary dentition. Shorter handle, smaller beak, finer geometry to engage primary tooth crowns without crushing.
The Diamond Extraction Forceps line offers an additional grade of beak engagement with diamond-coated beaks for improved grip on root surfaces — particularly useful for retained roots and broken-down crowns.
Chapter 4Cowhorn (Fig. 23) — the special case
Cowhorn forceps — Fig. 23 (right) and Fig. 24 (left) for split lower molar roots.
Fig. 23 is the most distinctive forceps in the entire numbering system. The beaks come to a sharp point designed to engage the bifurcation of a lower first or second molar. Inserted into the bifurcation, the closing pressure of the handle generates upward force on the crown and outward force on the roots, often delivering a deeply embedded molar with relatively little operator effort.
Risks: the pointed beak can fracture the buccal plate if force is applied before the PDL has been adequately luxated. Use only after thorough luxation with a luxator or elevator, and only on lower molars with sound bifurcations (not on primary teeth or hypoplastic roots).
Chapter 5Choosing your starter set
For a general practice, the starter 10-piece adult kit covers most extractions:
- Fig. 1 — upper centrals
- Fig. 7 — upper canines / premolars
- Fig. 17R — upper right molars
- Fig. 17L — upper left molars
- Fig. 51 — upper roots
- Fig. 151 — universal lower
- Fig. 22 — lower molars (smooth)
- Fig. 23 — lower molars (cowhorn)
- Fig. 79N — lower third molars
- Fig. 33 — lower roots
Pediatric / mixed dentition practices add the 7-piece child kit (Fig. 137, 138, 139, etc.) on top.
At a glanceAdult vs Junior vs Child forceps — at a glance
| Feature | Adult | Junior | Child |
|---|---|---|---|
| Target dentition | Permanent | Mixed / small permanent | Primary |
| Handle length | Full size | Slightly shorter | Short |
| Beak size | Standard | Smaller | Smallest |
| Common figures | 1, 17, 22, 23, 79, 151 | 13K, 22K, 37K | 137, 138, 139 |
| Best for | General adult extractions | Adolescents, small adult anatomy | Primary tooth extractions in pediatric practice |
| Sharpness upgrade | Diamond beak available | Standard | Standard / Diamond |
Build your extraction forceps kit
74 extraction forceps across adult, junior, child and Diamond ranges. All on the ergonomic Grip Master handle. Pre-built kits or individual figures available.
Browse all 74 extraction forceps →ErgoDenta extraction forceps — full numbered range
Browse the complete extraction range, from individual numbered patterns to ready-built kits for general practice and paediatric extractions in our Extraction shop.
Frequently asked questions
What does 'Fig. 17' mean on extraction forceps?
Fig. 17 designates upper molar extraction forceps in the classic surgical instrument numbering system. They come paired as 17R (right) and 17L (left) because the buccal roots of upper molars diverge, requiring beak geometry that mirrors for left and right sides. Most extraction kits include both.
What is a cowhorn forceps and when do I use one?
A cowhorn forceps is Fig. 23 — designed for lower first and second molars. The pointed beaks engage the bifurcation directly; closing the handle generates upward force on the crown plus outward force on the roots, delivering deeply embedded molars with relatively low operator effort. Only use after thorough luxation, and only on teeth with sound bifurcations.
Which forceps do I use for lower premolars?
Fig. 151 is the universal lower forceps — it covers lower incisors, canines and premolars on both sides of the arch with a single instrument. Many surgeons keep two or three Fig. 151 forceps on the kit because they're used so frequently.
What's the difference between Junior and Child extraction forceps?
Junior forceps (e.g. Fig. 13K, 22K, 37K) are slightly smaller adult forceps designed for adolescent permanent dentition or for adults with small anatomies. Child forceps (Fig. 137, 138, 139) are pediatric forceps designed specifically for primary teeth — shorter handles, smaller beaks, finer geometry to engage without crushing the primary crown.
Are Diamond extraction forceps actually diamond-coated?
Yes — the Diamond range has a diamond-particle coating bonded to the beak interior surface. This dramatically improves grip on root surfaces, particularly useful for retained roots and broken-down crowns where standard smooth beaks would slip. The diamond coating wears slowly under normal use and the forceps remain fully autoclavable.
Can I extract an upper molar with Fig. 1?
No — Fig. 1 is geometrically wrong for upper molars. Fig. 1 has narrow beaks designed for upper central incisors. Using it on a molar will fracture the crown and provide no useful engagement. Always match the figure number to the tooth type — Fig. 17 for upper molars.
How many extraction forceps do I really need to start a practice?
Ten figures cover the vast majority of adult extractions: Fig. 1, 7, 17R, 17L, 51 (upper); 151, 22, 23, 79N, 33 (lower). The 10-piece Diamond Extraction Forceps Kit from ErgoDenta packages exactly this range. Add the 7-piece child kit if you treat primary dentition.
What's the Grip Master handle?
Grip Master is ErgoDenta's ergonomic forceps handle — a contoured, anti-slip surface designed to reduce hand fatigue across long surgical lists. All ErgoDenta extraction forceps are built on the Grip Master handle as standard, not as an upgrade.
Is there a forceps for impacted lower wisdom teeth?
Fig. 79 and Fig. 79N are the standard lower third molar forceps — used after surgical exposure and elevation. For deeply impacted wisdom teeth, the extraction is typically completed with elevators (Apexo, Cryer) once the tooth has been sectioned; forceps are used only at the final delivery step.
Should adult and pediatric forceps be sterilised separately?
Not separately, but they should be stored in clearly labelled cassettes after sterilisation so the assistant can identify them quickly. Mixing adult and child forceps in the same tray slows down room turnover and increases the risk of grabbing the wrong size mid-procedure.