Orthodontics · Clear aligner workflow
Aligner Pliers — A Practical Guide to ErgoDenta's 8-Plier Orthodontic Range
Clear aligners are predictable — until they aren't. A tooth doesn't fully track. A patient flags a sore spot. An attachment needs a fresh window. Eight pliers cover all of those moments. This guide walks through the full ErgoDenta Aligner Plier range — what each tool does, when to reach for it, and how to choose between the TC and Non-TC versions.

Why a dedicated aligner-plier kit matters
Clear aligner therapy is one of the fastest-growing segments in orthodontics — but it's also the segment where small chair-side adjustments make the biggest difference. A 1.5 mm point elevation can save a refinement scan. A 6.0 mm half-moon can rescue a debonded attachment. A reverse-curve plier can save a tray from being remade.
The ErgoDenta range solves all three with eight purpose-built pliers spanning every step of the aligner workflow — punching, notching, correcting, elevating, and relieving — in both TC (tungsten-carbide) and Non-TC finishes so you can match tools to case volume and budget.
The full ErgoDenta Aligner Plier range
| Art no | Name | Size | Finish | Use |
|---|---|---|---|---|
| 4636 | Horizontal Plier | 12 cm | TC | Horizontal correction without punching |
| 4637 | Vertical Plier | 12 cm | TC | Vertical correction without punching |
| 4745 | Hole Punch Plier | 12 cm | TC | 6.0 mm half-moon for attachments |
| 4746 | Tear Drop Plier | 12 cm | TC | Hook / button window |
| 4747 | Aligner Point Elevation Plier | 12.5 cm | Stainless | 1.5 mm bump — reactivates a single tooth |
| 4748 | Aligner Reverse Plier | 14 cm | Stainless | Pressure-point relief |
| 4638 | Hole Punch Plier | 12 cm | Non-TC | Half-moon punch — entry tier |
| 4639 | Tear Drop Plier | 12 cm | Non-TC | Hook window — entry tier |
Each plier, what it does, and when to reach for it

Horizontal Plier (TC)
Adds a horizontal correction to a clear aligner without punching. Ideal for fine repositioning when a tray is just slightly off.
View product →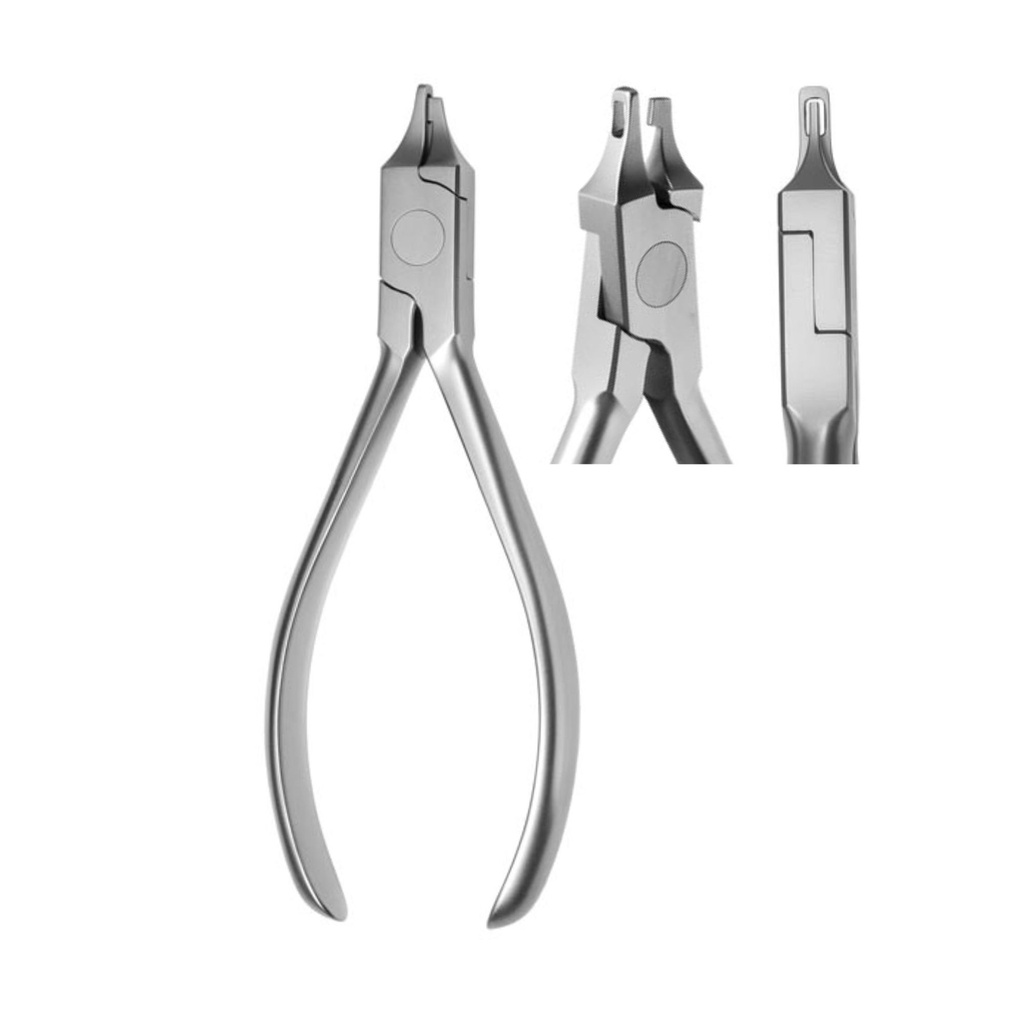
Vertical Plier (TC)
Adds a vertical correction without punching the aligner. The everyday partner to the Horizontal Plier — both belong on the same tray.
View product →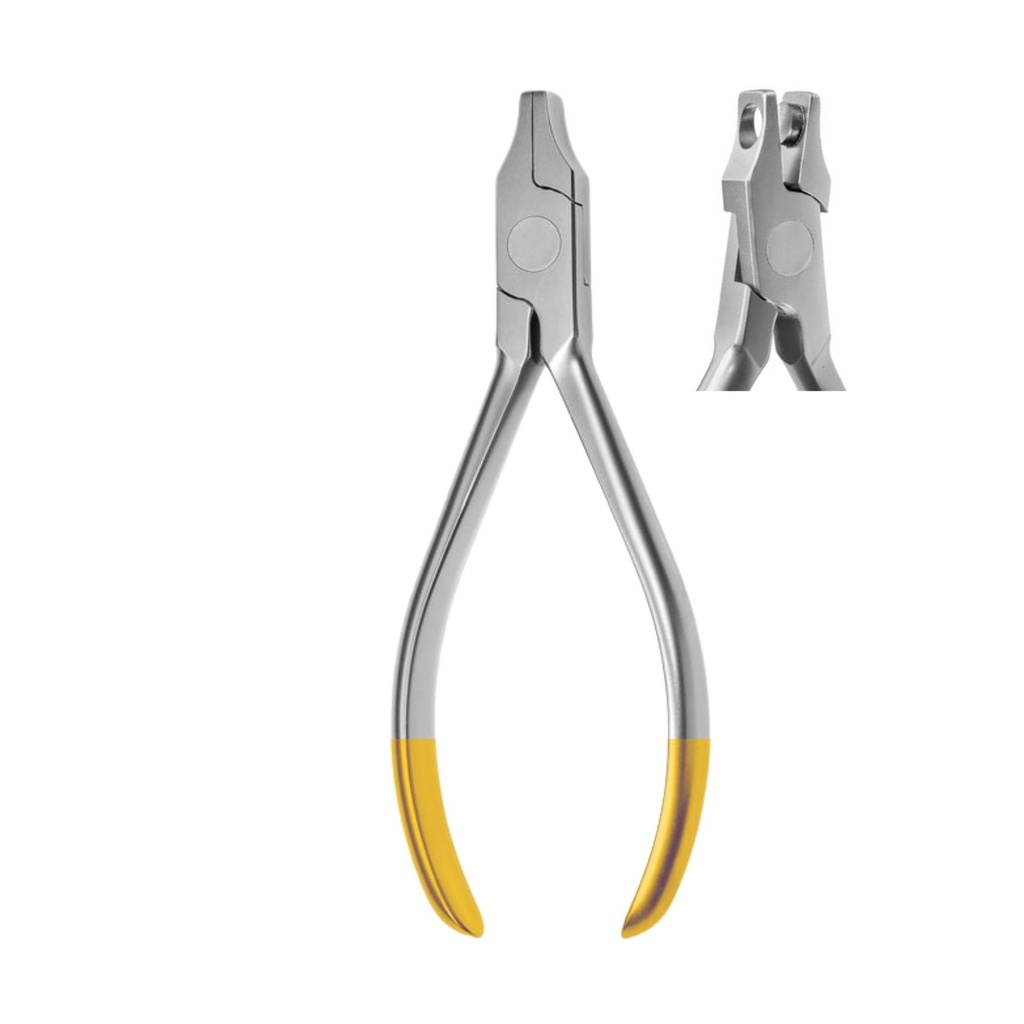
Hole Punch Plier (TC, 6.0 mm)
Creates a clean 6.0 mm half-moon — the standard window for attaching auxiliaries (buttons, hooks, elastics) to a clear tray.
View product →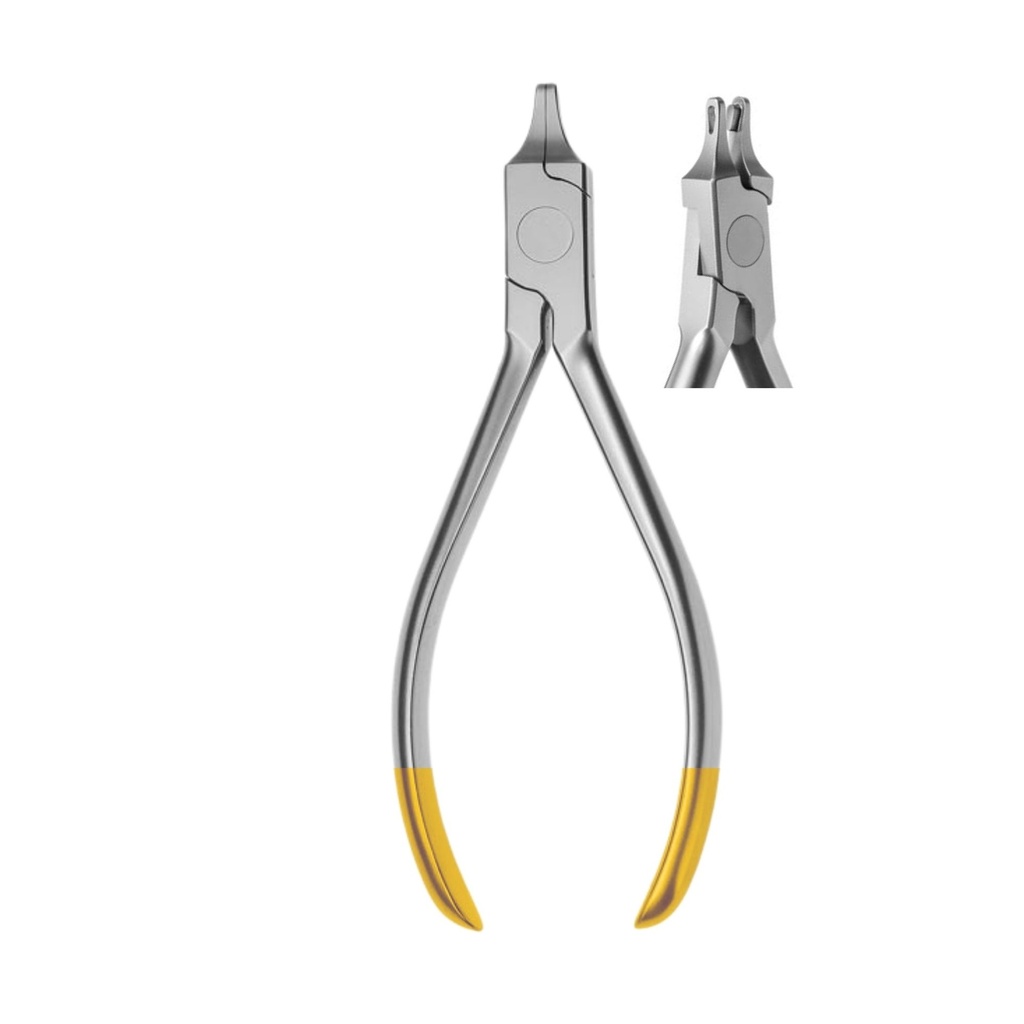
Tear Drop Plier (TC)
Notches a tear-drop window in the aligner where a hook or button is required. The classic auxiliary-prep plier — TC for long life.
View product →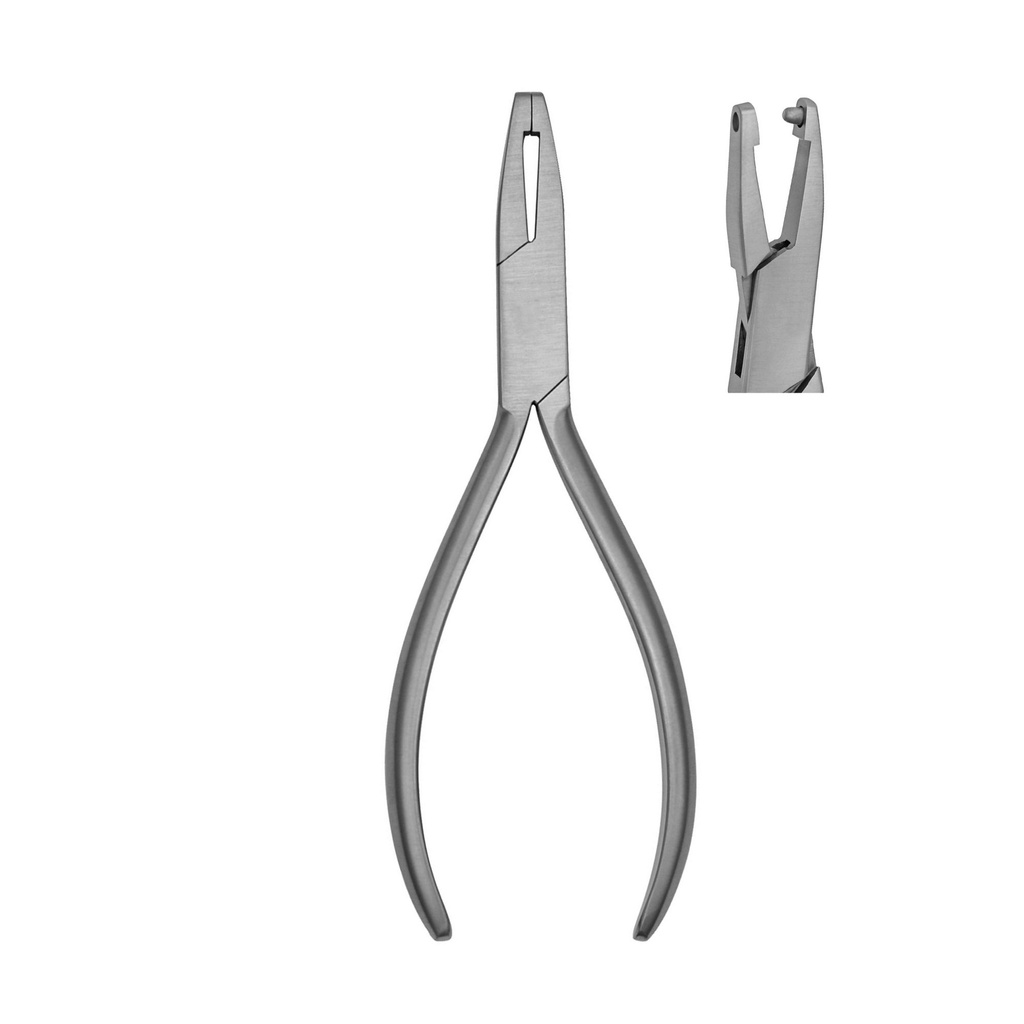
Aligner Point Elevation Plier (1.5 mm)
Adds a precise 1.5 mm point elevation — the "bump" technique used to drive a single tooth tip into final position when an attachment fails.
View product →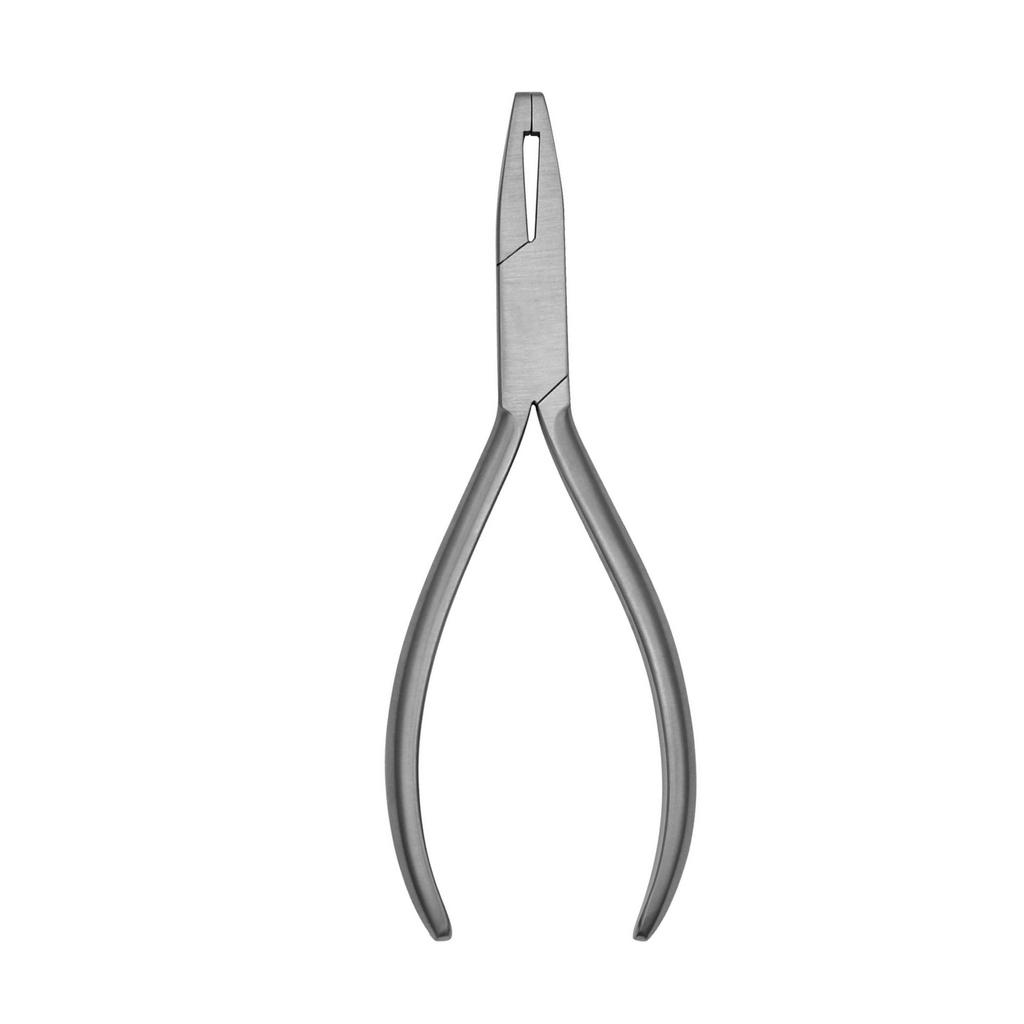
Aligner Reverse Plier
Reverse-curve plier for relieving pressure points on the lingual side. Saves a remake when a patient flags a single sore spot.
View product →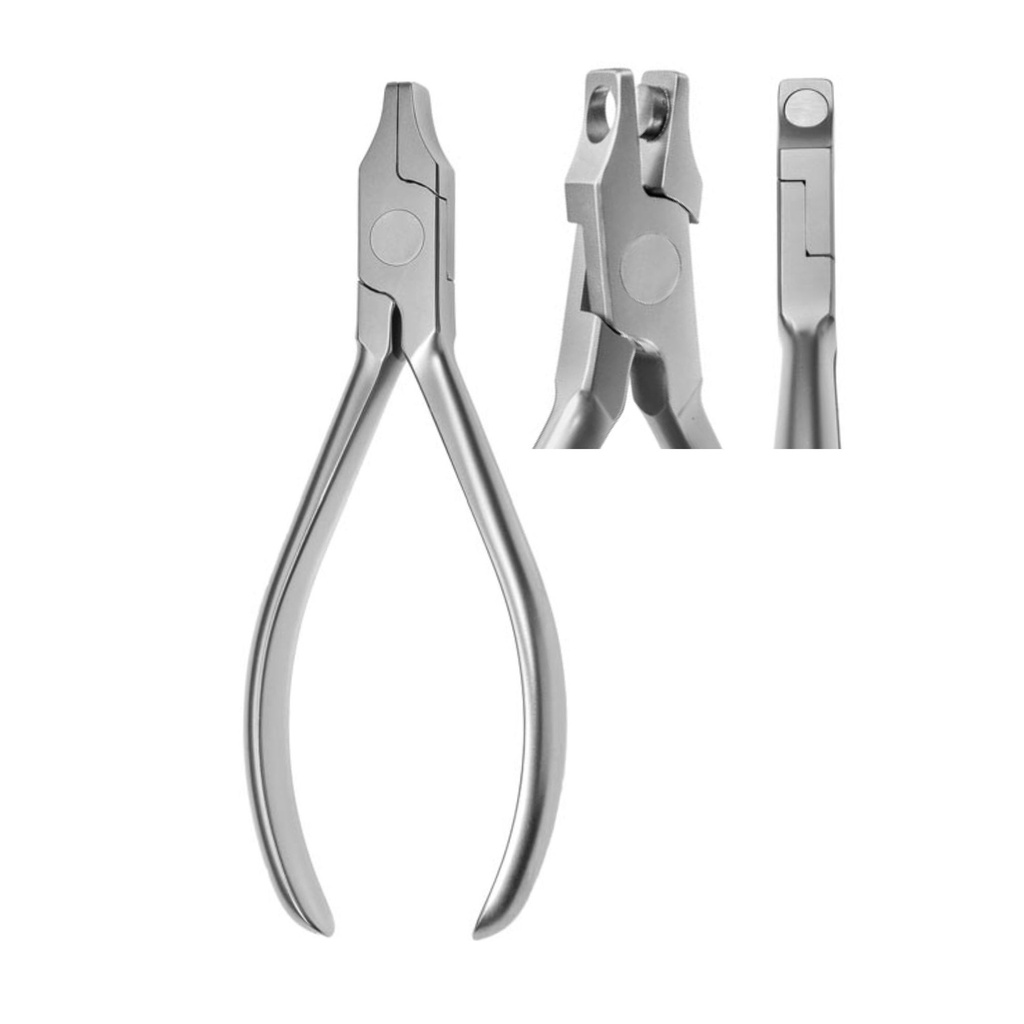
Hole Punch Plier (Non-TC)
Same half-moon function as the TC version, more accessible — suited to clinics doing lower aligner volumes.
View product →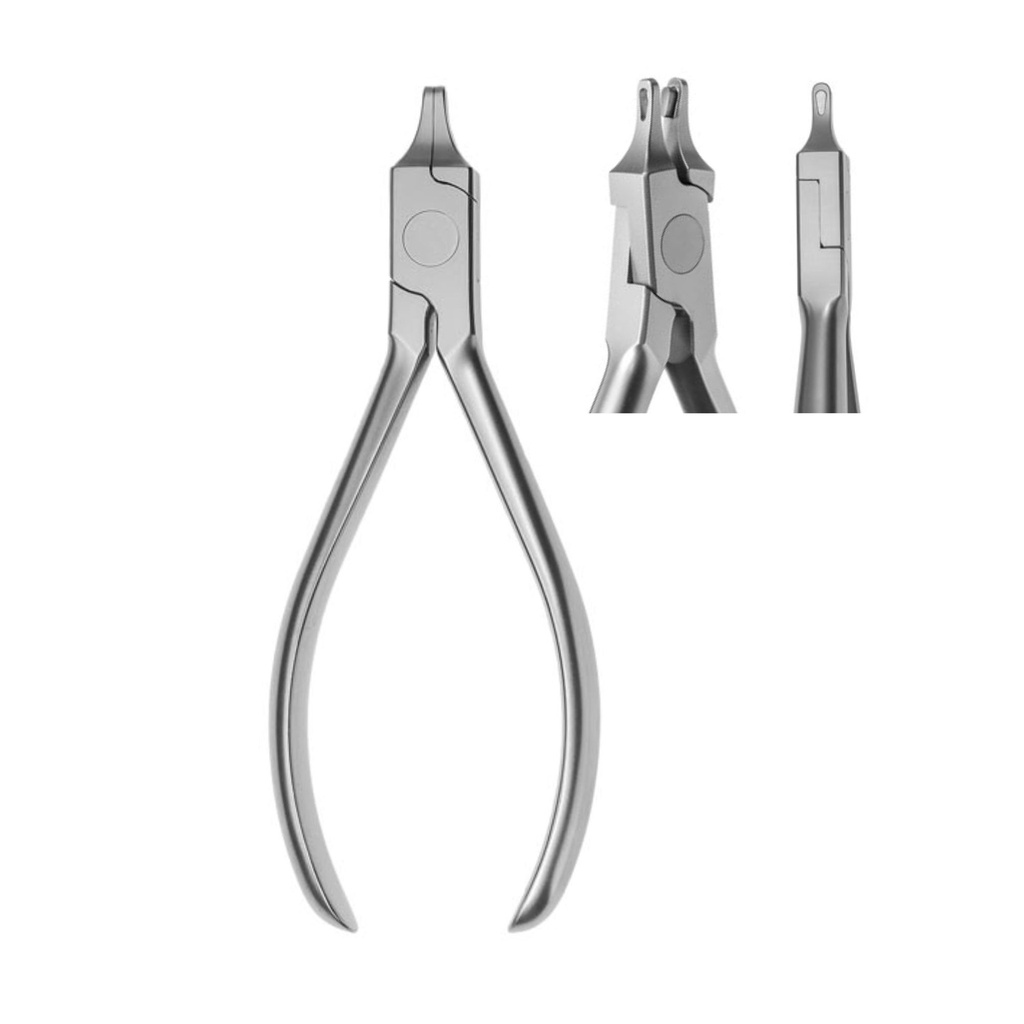
Tear Drop Plier (Non-TC)
Same tear-drop notching function as the TC version — non-TC alternative for clinics with lighter case loads.
View product →TC vs Non-TC — which finish should you choose?
| Factor | TC (Tungsten-Carbide) | Non-TC (Hardened Stainless) |
|---|---|---|
| Case volume | Weekly aligner cases | Occasional aligner cases |
| Tip lifespan | ≈ 3× longer | Standard |
| Investment level | Premium | Entry tier |
| Resharpenable | No (replace insert) | Yes (limited) |
| Best for | Busy ortho practices | Backup tray, low volume |
A starter kit recipe — three pliers to begin
If you're building your first aligner tray and want the smallest viable kit, start with three pliers and add the rest as your case volume grows:
- 1. Hole Punch Plier (4745) — every aligner workflow needs a clean 6.0 mm window for attachments.
- 2. Tear Drop Plier (4746) — for buttons, hooks, and elastics. The other "every-tray" plier.
- 3. Horizontal or Vertical Plier (4636 / 4637) — pick one to start; you'll want both eventually.
Add Point Elevation (4747) and Reverse Plier (4748) when you start seeing repeat refinements and chair-side relief cases — typically once you're running 5+ aligner cases per month.
Frequently asked questions
Which aligner pliers do I actually need to start?
If you're new to clear aligners and want the smallest viable kit, start with three: the Hole Punch (4745) for attaching buttons/hooks, the Tear Drop (4746) for hook windows, and either the Horizontal (4636) or Vertical (4637) Plier for fine corrections without remaking the tray. You can add the Point Elevation (4747) and Reverse Plier (4748) once your case volume justifies them.
What is the difference between TC and Non-TC pliers?
TC stands for tungsten-carbide — small carbide inserts welded to the working tips. TC tips stay sharp roughly three times longer than hardened stainless steel and resist deformation under repeated loading, but cost 25–35% more. Choose TC if you do clear aligners every week; choose Non-TC for occasional use or to keep a backup pair on the tray.
Why use a Point Elevation Plier instead of just remaking the aligner?
Point elevation lets you 'reactivate' an existing tray — adding a 1.5 mm bump that delivers extra force on a single tooth that hasn't fully tracked. It's faster than a remake, cheaper than a refinement scan, and saves the patient an extra appointment. You'd only remake the aligner when multiple teeth are off-track or the fit is generally poor.
When should I reach for the Reverse Plier?
When a patient comes back with one localised sore spot — usually on the lingual side — that's caused by a single pressure point. The Reverse Plier (4748) lets you relieve that exact area without compromising the rest of the tray's fit. It's a save-the-tray tool, not an everyday plier.
Can these pliers be sterilised in an autoclave?
Yes. All ErgoDenta aligner pliers are fully autoclavable at standard cycles (134 °C / 3 min or 121 °C / 15 min). For TC versions, dry the working tips before sterilising to extend the life of the carbide inserts. Always follow your country's reprocessing guideline.
What size hole does the Hole Punch make?
The TC Hole Punch (4745) produces a clean 6.0 mm half-moon — the standard window size for bonding ErgoDenta or any third-party orthodontic attachments. The non-TC version (4638) produces the same shape and dimension.
Are these pliers compatible with my existing aligner system?
Yes. The Aligner Plier range works with any thermoplastic clear aligner — Invisalign, ClearCorrect, Spark, in-house thermoformed trays, and white-label aligner systems. The pliers act on the tray itself, not on a brand-specific component.
Where can I see the full Aligner Plier specifications?
Each product page on our shop shows the full spec sheet, sizes, certificates, and high-resolution photos. You can also download the relevant pages from our 2026 catalogue, 'The Nordic Selection', on the catalogue page.